Sunday, December 30, 2012

Set map type of GoogleMap

To set the type of map tiles, call setMapType(int type) method of the GoogleMap acquired in last exercise "Get GoogleMap from MapFragment/SupportMapFragment".

Where type can be:
  • MAP_TYPE_NONE
    No base map tiles.
  • MAP_TYPE_NORMAL
    Basic maps.
  • MAP_TYPE_SATELLITE
    Satellite maps with no labels.
  • MAP_TYPE_HYBRID
    Satellite maps with a transparent layer of major streets.
  • MAP_TYPE_TERRAIN
    Terrain maps.

Example:
   FragmentManager myFragmentManager = getSupportFragmentManager();
   SupportMapFragment mySupportMapFragment 
    = (SupportMapFragment)myFragmentManager.findFragmentById(R.id.map);
   myMap = mySupportMapFragment.getMap();
   
   myMap.setMyLocationEnabled(true);

   //myMap.setMapType(GoogleMap.MAP_TYPE_HYBRID);
   //myMap.setMapType(GoogleMap.MAP_TYPE_NORMAL);
   //myMap.setMapType(GoogleMap.MAP_TYPE_SATELLITE);
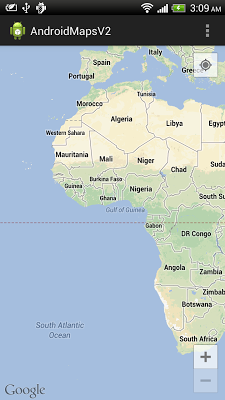
   myMap.setMapType(GoogleMap.MAP_TYPE_TERRAIN);

MAP_TYPE_NORMAL
MAP_TYPE_NORMAL
MAP_TYPE_SATELLITE
MAP_TYPE_SATELLITE
MAP_TYPE_HYBRID
MAP_TYPE_HYBRID
MAP_TYPE_TERRAIN
MAP_TYPE_TERRAIN


The series:
A simple example using Google Maps Android API v2, step by step.


Display my location on Google Maps Android API v2

To display my location on Google Maps Android API v2, call setMyLocationEnabled(true) method of the GoogleMap acquired in last exercise "Get GoogleMap from MapFragment/SupportMapFragment".

While enabled, the my-location layer continuously draws an indication of a user's current location and bearing, and displays UI controls that allow a user to interact with their location (for example, to enable or disable camera tracking of their location and bearing).


   myMap.setMyLocationEnabled(true);


Display my location on Google Maps Android API v2


The series:
A simple example using Google Maps Android API v2, step by step.

Saturday, December 29, 2012

Get GoogleMap from MapFragment/SupportMapFragment

To get the GoogleMap underlying MapFragment/SupportMapFragment, using getMap() method.

Example to acquire GoogleMap underlying MapFragment/SupportMapFragment.
   FragmentManager myFragmentManager = getSupportFragmentManager();
   SupportMapFragment mySupportMapFragment 
    = (SupportMapFragment)myFragmentManager.findFragmentById(R.id.map);
   myMap = mySupportMapFragment.getMap();


Modify Java code from last exercise "Check if correct Google Play Service available for Google Maps Android API v2.
package com.example.androidmapsv2;

import com.google.android.gms.common.ConnectionResult;
import com.google.android.gms.common.GooglePlayServicesUtil;
import com.google.android.gms.maps.GoogleMap;
import com.google.android.gms.maps.SupportMapFragment;

import android.app.AlertDialog;
import android.os.Bundle;
import android.support.v4.app.FragmentActivity;
import android.support.v4.app.FragmentManager;
import android.view.Menu;
import android.view.MenuItem;
import android.widget.Toast;

public class MainActivity extends FragmentActivity {
 
 final int RQS_GooglePlayServices = 1;
 private GoogleMap myMap;

 @Override
 protected void onCreate(Bundle savedInstanceState) {
  super.onCreate(savedInstanceState);
  setContentView(R.layout.activity_main);
  
   FragmentManager myFragmentManager = getSupportFragmentManager();
   SupportMapFragment mySupportMapFragment 
    = (SupportMapFragment)myFragmentManager.findFragmentById(R.id.map);
   myMap = mySupportMapFragment.getMap();

 }
 
 @Override
 public boolean onCreateOptionsMenu(Menu menu) {
  // Inflate the menu; this adds items to the action bar if it is present.
  getMenuInflater().inflate(R.menu.activity_main, menu);
  return true;
 }

 @Override
 public boolean onOptionsItemSelected(MenuItem item) {
  switch (item.getItemId()) {
     case R.id.menu_legalnotices:
      String LicenseInfo = GooglePlayServicesUtil.getOpenSourceSoftwareLicenseInfo(
        getApplicationContext());
      AlertDialog.Builder LicenseDialog = new AlertDialog.Builder(MainActivity.this);
      LicenseDialog.setTitle("Legal Notices");
      LicenseDialog.setMessage(LicenseInfo);
      LicenseDialog.show();
         return true;
     }
  return super.onOptionsItemSelected(item);
 }

 @Override
 protected void onResume() {
  // TODO Auto-generated method stub
  super.onResume();

  int resultCode = GooglePlayServicesUtil.isGooglePlayServicesAvailable(getApplicationContext());
  
  if (resultCode == ConnectionResult.SUCCESS){
   Toast.makeText(getApplicationContext(), 
     "isGooglePlayServicesAvailable SUCCESS", 
     Toast.LENGTH_LONG).show();
  }else{
   GooglePlayServicesUtil.getErrorDialog(resultCode, this, RQS_GooglePlayServices);
  }
  
 }

}


Also correct the layout (a TextView is mis-placed in former version!).
<RelativeLayout xmlns:android="http://schemas.android.com/apk/res/android"
    xmlns:tools="http://schemas.android.com/tools"
    android:layout_width="match_parent"
    android:layout_height="match_parent"
    tools:context=".MainActivity" >

    <fragment
        android:id="@+id/map"
        android:layout_width="match_parent"
        android:layout_height="match_parent"
        class="com.google.android.gms.maps.SupportMapFragment"/>

</RelativeLayout>


download filesDownload the files.

Next:
- Display my location on Google Maps Android API v2


The series:
A simple example using Google Maps Android API v2, step by step.

Friday, December 28, 2012

Check if correct Google Play Service available for Google Maps Android API v2

According to Google Play Services Document, apps using Google Play Service API should Ensuring Devices Have the Google Play services APK. So we have to check isGooglePlayServicesAvailable() and call getErrorDialog() if not SUCCESS.

Actually in my trial experience to uninstall Google Play Service before running. The app will ask to install Google Play Service automatically, even I haven't check isGooglePlayServicesAvailable(). So I can't clarify if my code work correctly or not!

update@2013-07-16: show() must be called. ~ thanks Morrox comment.
 
 GooglePlayServicesUtil.getErrorDialog(resultCode, this, RQS_GooglePlayServices).show();


Check if correct Google Play Service available for Google Maps Android API v2


Modify the java code from the last post "Include open source software license information/Legal Notices in your app using Google Maps Android API v2", to check isGooglePlayServicesAvailable() in onResume().

package com.example.androidmapsv2;

import com.google.android.gms.common.ConnectionResult;
import com.google.android.gms.common.GooglePlayServicesUtil;

import android.app.AlertDialog;
import android.os.Bundle;
import android.support.v4.app.FragmentActivity;
import android.view.Menu;
import android.view.MenuItem;
import android.widget.Toast;

public class MainActivity extends FragmentActivity {
 
 final int RQS_GooglePlayServices = 1;

 @Override
 protected void onCreate(Bundle savedInstanceState) {
  super.onCreate(savedInstanceState);
  setContentView(R.layout.activity_main);
 }
 
 @Override
 public boolean onCreateOptionsMenu(Menu menu) {
  // Inflate the menu; this adds items to the action bar if it is present.
  getMenuInflater().inflate(R.menu.activity_main, menu);
  return true;
 }

 @Override
 public boolean onOptionsItemSelected(MenuItem item) {
  switch (item.getItemId()) {
     case R.id.menu_legalnotices:
      String LicenseInfo = GooglePlayServicesUtil.getOpenSourceSoftwareLicenseInfo(
        getApplicationContext());
      AlertDialog.Builder LicenseDialog = new AlertDialog.Builder(MainActivity.this);
      LicenseDialog.setTitle("Legal Notices");
      LicenseDialog.setMessage(LicenseInfo);
      LicenseDialog.show();
         return true;
     }
  return super.onOptionsItemSelected(item);
 }

 @Override
 protected void onResume() {
  // TODO Auto-generated method stub
  super.onResume();

  int resultCode = GooglePlayServicesUtil.isGooglePlayServicesAvailable(getApplicationContext());
  
  if (resultCode == ConnectionResult.SUCCESS){
   Toast.makeText(getApplicationContext(), 
     "isGooglePlayServicesAvailable SUCCESS", 
     Toast.LENGTH_LONG).show();
  }else{
   GooglePlayServicesUtil.getErrorDialog(resultCode, this, RQS_GooglePlayServices);
  }
  
 }

}


download filesDownload the files.


The series:
A simple example using Google Maps Android API v2, step by step.

Thursday, December 27, 2012

Include open source software license information/Legal Notices in your app using Google Maps Android API v2

If you use the Google Maps Android API in your application, you must include the Google Play Services attribution text as part of a "Legal Notices" section in your application. Including legal notices as an independent menu item, or as part of an "About" menu item, is recommended.

The attribution text is available by making a call to GooglePlayServicesUtil.getOpenSourceSoftwareLicenseInfo.

source: Google Maps Android API v2 - Attribution Requirements.

open source software license information/Legal Notices for Google Maps Android API v2


To include menu option "Legal Notices" to display open source software license information in a dialog.:

Modify /res/values/strings.xml to include string resource of "menu_legalnotices".
<?xml version="1.0" encoding="utf-8"?>
<resources>

    <string name="app_name">AndroidMapsV2</string>
    <string name="hello_world">Hello world!</string>
    <string name="menu_legalnotices">Legal Notices</string>

</resources>


Modify /res/menu/activity_main.xml to add menu resource of "menu_legalnotices".
<menu xmlns:android="http://schemas.android.com/apk/res/android" >

    <item
        android:id="@+id/menu_legalnotices"
        android:orderInCategory="100"
        android:showAsAction="never"
        android:title="@string/menu_legalnotices"/>

</menu>


Modify the java code to override onOptionsItemSelected() to display "open source software license information" in dialog.
package com.example.androidmapsv2;

import com.google.android.gms.common.GooglePlayServicesUtil;

import android.app.AlertDialog;
import android.os.Bundle;
import android.support.v4.app.FragmentActivity;
import android.view.Menu;
import android.view.MenuItem;

public class MainActivity extends FragmentActivity {

 @Override
 protected void onCreate(Bundle savedInstanceState) {
  super.onCreate(savedInstanceState);
  setContentView(R.layout.activity_main);
 }
 
 @Override
 public boolean onCreateOptionsMenu(Menu menu) {
  // Inflate the menu; this adds items to the action bar if it is present.
  getMenuInflater().inflate(R.menu.activity_main, menu);
  return true;
 }

 @Override
 public boolean onOptionsItemSelected(MenuItem item) {
  switch (item.getItemId()) {
     case R.id.menu_legalnotices:
      String LicenseInfo = GooglePlayServicesUtil.getOpenSourceSoftwareLicenseInfo(
        getApplicationContext());
      AlertDialog.Builder LicenseDialog = new AlertDialog.Builder(MainActivity.this);
      LicenseDialog.setTitle("Legal Notices");
      LicenseDialog.setMessage(LicenseInfo);
      LicenseDialog.show();
         return true;
     }
  return super.onOptionsItemSelected(item);
 }

}


download filesDownload the files.


The series:
A simple example using Google Maps Android API v2, step by step.

Wednesday, December 26, 2012

Implement OnItemClickListener for GridView

My previous post describe how to implement "GridView loading photos from SD Card". Now we implement OnItemClickListener for the GridView, to display the clicked image path.

OnItemClickListener for GridView


Implement OnItemClickListener, to override onItemClick() method. To retrieve the clicked item  in onItemClick() method, call parent.getItemAtPosition(position).

We also have to modify getItem() method of ImageAdapter class, to return the item in our expected format. In this exercise, string of the file path is return.

package com.example.androidgridview;

import java.io.File;
import java.util.ArrayList;

import android.os.Bundle;
import android.os.Environment;
import android.app.Activity;
import android.content.Context;
import android.graphics.Bitmap;
import android.graphics.BitmapFactory;
import android.view.View;
import android.view.ViewGroup;
import android.widget.AdapterView;
import android.widget.AdapterView.OnItemClickListener;
import android.widget.BaseAdapter;
import android.widget.GridView;
import android.widget.ImageView;
import android.widget.Toast;

public class MainActivity extends Activity {

    public class ImageAdapter extends BaseAdapter {
     
     private Context mContext;
     ArrayList<String> itemList = new ArrayList<String>();
     
     public ImageAdapter(Context c) {
      mContext = c; 
     }
     
     void add(String path){
      itemList.add(path); 
     }

  @Override
  public int getCount() {
   return itemList.size();
  }

  @Override
  public Object getItem(int position) {
   // TODO Auto-generated method stub
   return itemList.get(position);
  }

  @Override
  public long getItemId(int position) {
   // TODO Auto-generated method stub
   return 0;
  }

  @Override
  public View getView(int position, View convertView, ViewGroup parent) {
   ImageView imageView;
         if (convertView == null) {  // if it's not recycled, initialize some attributes
             imageView = new ImageView(mContext);
             imageView.setLayoutParams(new GridView.LayoutParams(220, 220));
             imageView.setScaleType(ImageView.ScaleType.CENTER_CROP);
             imageView.setPadding(8, 8, 8, 8);
         } else {
             imageView = (ImageView) convertView;
         }

         Bitmap bm = decodeSampledBitmapFromUri(itemList.get(position), 220, 220);

         imageView.setImageBitmap(bm);
         return imageView;
  }
  
  public Bitmap decodeSampledBitmapFromUri(String path, int reqWidth, int reqHeight) {
   
   Bitmap bm = null;
   // First decode with inJustDecodeBounds=true to check dimensions
   final BitmapFactory.Options options = new BitmapFactory.Options();
   options.inJustDecodeBounds = true;
   BitmapFactory.decodeFile(path, options);
       
   // Calculate inSampleSize
   options.inSampleSize = calculateInSampleSize(options, reqWidth, reqHeight);
       
   // Decode bitmap with inSampleSize set
   options.inJustDecodeBounds = false;
   bm = BitmapFactory.decodeFile(path, options); 
       
   return bm;   
  }
  
  public int calculateInSampleSize(
    
   BitmapFactory.Options options, int reqWidth, int reqHeight) {
   // Raw height and width of image
   final int height = options.outHeight;
   final int width = options.outWidth;
   int inSampleSize = 1;
   
   if (height > reqHeight || width > reqWidth) {
    if (width > height) {
     inSampleSize = Math.round((float)height / (float)reqHeight);    
    } else {
     inSampleSize = Math.round((float)width / (float)reqWidth);    
    }   
   }
   
   return inSampleSize;    
  }
  
 }
    
    ImageAdapter myImageAdapter;

 @Override
    public void onCreate(Bundle savedInstanceState) {
        super.onCreate(savedInstanceState);
        setContentView(R.layout.activity_main);
        
        GridView gridview = (GridView) findViewById(R.id.gridview);
        myImageAdapter = new ImageAdapter(this);
        gridview.setAdapter(myImageAdapter);
        
        String ExternalStorageDirectoryPath = Environment
          .getExternalStorageDirectory()
          .getAbsolutePath();
        
        String targetPath = ExternalStorageDirectoryPath + "/test/";
        
        Toast.makeText(getApplicationContext(), targetPath, Toast.LENGTH_LONG).show();
        File targetDirector = new File(targetPath);
        
        File[] files = targetDirector.listFiles();
        for (File file : files){
         myImageAdapter.add(file.getAbsolutePath()); 
        }
        
        gridview.setOnItemClickListener(myOnItemClickListener);
        
    }
 
 OnItemClickListener myOnItemClickListener
 = new OnItemClickListener(){

  @Override
  public void onItemClick(AdapterView<?> parent, View view, int position,
    long id) {
   String prompt = (String)parent.getItemAtPosition(position);
   Toast.makeText(getApplicationContext(), 
     prompt, 
     Toast.LENGTH_LONG).show();
   
  }};

}


download filesDownload the files.

Next: GridView example: load images to GridView from SD Card
Monday, December 24, 2012

Handle onClick for our custom LinearLayout for Gallery-like HorizontalScrollView

The post "Implement Gallery-like HorizontalScrollView" and "Implement custom LinearLayout for Gallery-like HorizontalScrollView" explain how to implement Gallery-like HorizontalScrollView.

In this post, we will implement OnClickListener for the ImageView(s) to handle user click.

Handle onClick for our custom LinearLayout for Gallery-like HorizontalScrollView


Modify MyHorizontalLayout.java from the exercise "Implement custom LinearLayout for Gallery-like HorizontalScrollView" to call setOnClickListener() when create ImageView, in getImageView() method. For "Implement Gallery-like HorizontalScrollView" without custom LinearLayout, you can do the same in insertPhoto() method.

package com.example.androidhorizontalscrollviewgallery;
import java.util.ArrayList;

import android.content.Context;
import android.graphics.Bitmap;
import android.graphics.BitmapFactory;
import android.util.AttributeSet;
import android.view.View;
import android.widget.ImageView;
import android.widget.LinearLayout;
import android.widget.Toast;

public class MyHorizontalLayout extends LinearLayout {
 
 Context myContext;
 ArrayList<String> itemList = new ArrayList<String>();

 public MyHorizontalLayout(Context context) {
  super(context);
  myContext = context;
 }

 public MyHorizontalLayout(Context context, AttributeSet attrs) {
  super(context, attrs);
  myContext = context;
 }

 public MyHorizontalLayout(Context context, AttributeSet attrs,
   int defStyle) {
  super(context, attrs, defStyle);
  myContext = context;
 }
 
 void add(String path){
  int newIdx = itemList.size();
  itemList.add(path);
  addView(getImageView(newIdx));
 }
 
 ImageView getImageView(final int i){
  Bitmap bm = null;
  if (i < itemList.size()){
   bm = decodeSampledBitmapFromUri(itemList.get(i), 220, 220);
  }
  
  ImageView imageView = new ImageView(myContext);
     imageView.setLayoutParams(new LayoutParams(220, 220));
     imageView.setScaleType(ImageView.ScaleType.CENTER_CROP);
     imageView.setImageBitmap(bm);
     
     imageView.setOnClickListener(new OnClickListener(){

   @Override
   public void onClick(View v) {
    Toast.makeText(myContext, 
      "Clicked - " + itemList.get(i), 
      Toast.LENGTH_LONG).show();
   }});

  return imageView;
 }
 
 public Bitmap decodeSampledBitmapFromUri(String path, int reqWidth, int reqHeight) {
     Bitmap bm = null;
     
     // First decode with inJustDecodeBounds=true to check dimensions
     final BitmapFactory.Options options = new BitmapFactory.Options();
     options.inJustDecodeBounds = true;
     BitmapFactory.decodeFile(path, options);
     
     // Calculate inSampleSize
     options.inSampleSize = calculateInSampleSize(options, reqWidth, reqHeight);
     
     // Decode bitmap with inSampleSize set
     options.inJustDecodeBounds = false;
     bm = BitmapFactory.decodeFile(path, options); 
     
     return bm;  
    }
    
    public int calculateInSampleSize(
      
     BitmapFactory.Options options, int reqWidth, int reqHeight) {
     // Raw height and width of image
     final int height = options.outHeight;
     final int width = options.outWidth;
     int inSampleSize = 1;
        
     if (height > reqHeight || width > reqWidth) {
      if (width > height) {
       inSampleSize = Math.round((float)height / (float)reqHeight);   
      } else {
       inSampleSize = Math.round((float)width / (float)reqWidth);   
      }   
     }
     
     return inSampleSize;   
    }
 
}


download filesDownload the files.

Friday, December 21, 2012

Google Maps Android API v2 with blank map displayed, wrong API Key assigned.

If you use Google Maps Android API v2, but with a blank (gray) map displayed (like the screen shown below), and "E/Google Maps Android API(12676): Authorization failure" reported in LogCat; may be caused by a wrong API Key assigned.

Google Maps Android API v2 with blank map displayed, wrong API Key assigned.


In order to use Maps Android API, you have to assign a API Key in AndroidManifest.xml.
        <meta-data
            android:name="com.google.android.maps.v2.API_KEY"
            android:value="your API Key here"/>


You have to assign Debug API Key in testing, and Release API Key when release APK. Just insert the correct API Key, clean and rebuild your project should be OK. It's suggested to un-install your old app in device before re-load.


The series:
A simple example using Google Maps Android API v2, step by step.

Using SupportMapFragment

The post "A simple example using Google Maps Android API v2" using com.google.android.gms.maps.MapFragment. It work on device run API 12 and above. For older API level, using com.google.android.gms.maps.SupportMapFragment.

SupportMapFragment on Nexus One running Android 2.3.6


Modify layout to replace com.google.android.gms.maps.MapFragment with com.google.android.gms.maps.SupportMapFragment.
<RelativeLayout xmlns:android="http://schemas.android.com/apk/res/android"
    xmlns:tools="http://schemas.android.com/tools"
    android:layout_width="match_parent"
    android:layout_height="match_parent"
    tools:context=".MainActivity" >

    <TextView
        android:layout_width="wrap_content"
        android:layout_height="wrap_content"
        android:layout_centerHorizontal="true"
        android:layout_centerVertical="true"
        android:text="@string/hello_world" />
    <fragment
        android:id="@+id/map"
        android:layout_width="match_parent"
        android:layout_height="match_parent"
        class="com.google.android.gms.maps.SupportMapFragment"/>

</RelativeLayout>


Modify main code to extend android.support.v4.app.FragmentActivity, rather than Activity. Otherwise, AndroidRuntime will be Caused by: java.lang.ClassNotFoundException: android.view.fragment in loader dalvik.system.PathClassLoader.
package com.example.androidmapsv2;

import android.os.Bundle;
import android.support.v4.app.FragmentActivity;

public class MainActivity extends FragmentActivity {

 @Override
 protected void onCreate(Bundle savedInstanceState) {
  super.onCreate(savedInstanceState);
  setContentView(R.layout.activity_main);
 }

}


The series:
A simple example using Google Maps Android API v2, step by step.

+1000

Finally get +1000 at the day of End of the World:)


Turn off Lint Error Checking

After you finished coding with Google Maps Android API v2, and going to Export Signed Application Package (Right click your project -> Android Tools -> Export Signed Application Package...), MAY BE Export will be aborted because fetal lint errors were found, caused by something like:

"common_google_play_services_unknown_issue" is not translated...

lint error

It can be solved by turn off Run full error check.

Click Window in Eclipse, select Preferences.

Select Android -> Lint Error Checking on the left, and turn off "Run full error check when exporting app and abort if errors are found"


Then, you can clean and re-build your project.


Updated@2013-03-13: Updated steps with video.


The series:
A simple example using Google Maps Android API v2, step by step.

A simple example using Google Maps Android API v2


To implement Google Maps Android API v2 , follow the steps:
[Updated@2015-10-13: Another series base on Android Studio is on-going:
Step-by-step of Android Google Maps Activity using Google Maps Android API v2, on Android Studio]

Now, it's time to implement your code to add Google Maps Android API v2. Notice that you have to keep both your project and google-play-services_lib opened in Eclipse.


Please note that the code below is only useful for testing your settings in an application targeting Android API 12 or later, This code should not be used in a production application.

Modify layout to add frqgment of com.google.android.gms.maps.MapFragment.
<RelativeLayout xmlns:android="http://schemas.android.com/apk/res/android"
    xmlns:tools="http://schemas.android.com/tools"
    android:layout_width="match_parent"
    android:layout_height="match_parent"
    tools:context=".MainActivity" >

    <TextView
        android:layout_width="wrap_content"
        android:layout_height="wrap_content"
        android:layout_centerHorizontal="true"
        android:layout_centerVertical="true"
        android:text="@string/hello_world" />
    <fragment
        android:id="@+id/map"
        android:layout_width="match_parent"
        android:layout_height="match_parent"
        class="com.google.android.gms.maps.MapFragment"/>

</RelativeLayout>


Main code, actually nothing changed.
package com.example.androidmapsv2;

import android.os.Bundle;
import android.app.Activity;

public class MainActivity extends Activity {

 @Override
 protected void onCreate(Bundle savedInstanceState) {
  super.onCreate(savedInstanceState);
  setContentView(R.layout.activity_main);
 }

}


A simple example using Google Maps Android API v2


download filesDownload the files.

Exported AndroidMapsV2.apk


Related:
- When Android Meets Maps, Google I/O 2013 video


Thursday, December 20, 2012

Modify AndroidManifest.xml for Google Maps Android API v2

To use Google Maps Android API v2 on your app, you have to modify your AndroidManifest.xml as listed below:
  • Insert <meta-data> element to include API key as a child of the <application>

    <meta-data
    android:name="com.google.android.maps.v2.API_KEY"
    android:value="--- your API Key here ---"/>


    Remember to replace value with your own API Key.

    Please notice that you have to use debug API Key (refer to "Generate Debug API Key for Google Maps Android API v2 service") in your testing. And then replace with release API key (refer to "Create and Obtain API Key for Google Maps Android API v2 service") in your release APK.
  • Add <permission> and <uses-permission> of MAPS_RECEIVE.

    <permission
    android:name="com.example.androidmapsv2.permission.MAPS_RECEIVE"
    android:protectionLevel="signature"></permission>
    <uses-permission
    android:name="com.example.androidmapsv2.permission.MAPS_RECEIVE"/>


    where com.example.androidmapsv2 is my package, replace with your own package name.

  • Add uses-permission:

    <uses-permission
    android:name="com.google.android.providers.gsf.permission.READ_GSERVICES"/>
    <uses-permission
    android:name="android.permission.INTERNET"/>
    <uses-permission
    android:name="android.permission.WRITE_EXTERNAL_STORAGE"/>


    and optional:

    <uses-permission
    android:name="android.permission.ACCESS_COARSE_LOCATION"/>
    <uses-permission
    android:name="android.permission.ACCESS_FINE_LOCATION"/>


  • Specify uses-feature of OpenGL ES 2:

    <uses-feature
    android:glEsVersion="0x00020000"
    android:required="true"/>


Finally, the AndroidManifest.xml will like it:

<?xml version="1.0" encoding="utf-8"?>
<manifest xmlns:android="http://schemas.android.com/apk/res/android"
    package="com.example.androidmapsv2"
    android:versionCode="1"
    android:versionName="1.0" >

    <uses-sdk
        android:minSdkVersion="8"
        android:targetSdkVersion="16" />
    
    <permission 
        android:name="com.example.androidmapsv2.permission.MAPS_RECEIVE" 
        android:protectionLevel="signature"></permission>
    <uses-permission 
        android:name="com.example.androidmapsv2.permission.MAPS_RECEIVE"/>
    <uses-permission 
        android:name="com.google.android.providers.gsf.permission.READ_GSERVICES"/>
    <uses-permission 
        android:name="android.permission.INTERNET"/>
    <uses-permission 
        android:name="android.permission.WRITE_EXTERNAL_STORAGE"/>
    <uses-permission 
        android:name="android.permission.ACCESS_COARSE_LOCATION"/>
    <uses-permission 
        android:name="android.permission.ACCESS_FINE_LOCATION"/>
    
    <uses-feature
        android:glEsVersion="0x00020000"
        android:required="true"/>
    
    <application
        android:allowBackup="true"
        android:icon="@drawable/ic_launcher"
        android:label="@string/app_name"
        android:theme="@style/AppTheme" >
        <meta-data
            android:name="com.google.android.maps.v2.API_KEY"
            android:value="--- your API Key here ---"/>
        <activity
            android:name="com.example.androidmapsv2.MainActivity"
            android:label="@string/app_name" >
            <intent-filter>
                <action android:name="android.intent.action.MAIN" />

                <category android:name="android.intent.category.LAUNCHER" />
            </intent-filter>
        </activity>
    </application>

</manifest>


The series:
A simple example using Google Maps Android API v2, step by step.

Wednesday, December 19, 2012

Add reference library google-play-services.jar to project using MapFragment and SupportMapFragment

To use MapFragment or SupportMapFragment on your Android App, you have to add reference library google-play-services.jar to your project. Otherwise, ClassNotFoundException will be thrown caused by com.google.android.gms.maps.MapFragment or com.google.android.gms.maps.SupportMapFragment.

To add reference library google-play-services.jar:

- Right click on your project, select Properties.


- Select Android on the left selection, scroll down to the Library at right, and click Add.

- Select google-play-services_lib and click OK.

- Apply and click OK.


The series:
A simple example using Google Maps Android API v2, step by step.


Remark: Somebody report that ClassNotFOundException still happen even added reference library google-play-services.jar! Refer to comments in the post Using SupportMapFragment. So anybody have any other suggestion, please share in comments. Thanks.

Related:
- Tips to add Support Library


Generate Debug API Key for Google Maps Android API v2 service

The previous post explain how to "Create and Obtain API Key for Google Maps Android API v2 service". In my trial experience, you need a debug API Key, for your testing. Means you test on your device connected with PC and download from Eclipse.

To generate debug API key, repeat the steps in the post  "Create and Obtain API Key for Google Maps Android API v2 service", with debug certificate fingerprint (described in the post "Displaying the SHA1 certificate fingerprint") instead of release certificate fingerprint. The output should be like this:

Debug API Key for Google Maps Android API v2 service

In my test, both API Key (Key for Android apps (with certificates) and Key for browser apps (with referers)) can display map.


The series:
A simple example using Google Maps Android API v2, step by step.

Tuesday, December 18, 2012

Create and Obtain API Key for Google Maps Android API v2 service

To obtain API Key for Google Maps Android API v2 service, you have to create API Project and obtaining your API Key in Google APIs Console.

Create API Project:

- Visit Google APIs Console, you have to login using your Google account.

- Scroll down to check agree and accept to these terms.


- Expend the select on left and select Other projects -> Create...


- Enter the name of your project and click Create project.


- Make sure Service is selected on the left.


- Click to enable Google Maps Android API v2.


- You will be asked to agree and accept the terms of Google Maps/Earth APIs service.


- Your Google Maps Android API v2 services for the project will become ON now.


Obtain an API Key:

- Click API Access and Create New Android Key...


- Enter your SHA1 Certificate fingerprint (refer to the post "Displaying the SHA1 certificate fingerprint") and package name in the box, and click Create.


- Finally, your API Key generated.


The series:
A simple example using Google Maps Android API v2, step by step.